一、创建项目
1.直接创建项目
1
2
3
4
5
6
7
| 使用 NPM:
$ npm create vite@latest
使用 Yarn:
$ yarn create vite
使用 PNPM:
$ pnpm create vite
然后按照提示操作即可!(选择vue,vue-ts)
|
2.使用模板创建项目
通过附加的命令行选项直接指定项目名称和你想要使用的模板例如,要构建一个 Vite + Vue 项目,运行:
1
2
3
4
5
6
7
8
| 使用 npm 6.x:
npm create vite@latest my-vue-app --template vue
使用 npm 7+, extra double-dash is needed:
npm create vite@latest my-vue-app -- --template vue
使用 yarn:
yarn create vite my-vue-app --template vue
使用 pnpm:
pnpm create vite my-vue-app --template vue
|
然后npm i 或者 yarn install 运行yarn dev 看看浏览器运行成了没,第一步就大功告成了
二、vite配置别名和环境变量的配置
1.配置别名
使用编辑器VScode打开刚刚搭建好的项目 进入配置文件 vite.config.ts
配置别名后的vite.config.ts:
1
2
3
4
5
6
7
8
9
10
11
12
13
| import { defineConfig } from 'vite'
import vue from '@vitejs/plugin-vue'
import path from 'path'
const resolve = (dir: string) => path.join(__dirname, dir)
export default defineConfig({
plugins: [vue()],
resolve: {
alias: {
'@': resolve('src'),
}
}
})
|
此时 TS 可能有这个错误提示:找不到模块“path”或其相应的类型声明
解决方法:
1
| npm install @types/node --save-dev或者yarn add @types/node --save-dev
|
还需要在tsconfig.json的paths配置
1
2
3
4
5
6
7
8
9
10
11
12
13
14
15
| "baseUrl": ".",
"paths": {
"@/*": [
"src/*"
],
"comps/*": [
"src/components/*"
],
"views/*": [
"src/views/*"
],
"store/*": [
"src/store/*"
]
},
|
2.环境变量的配置
vite 提供了两种模式:具有开发服务器的开发模式(development)和生产模式(production)
项目根目录新建:.env.development :
1
2
3
| NODE_ENV=development
VITE_APP_WEB_URL= 'YOUR WEB URL'
|
项目根目录新建:.env.production :
1
2
3
| NODE_ENV=production
VITE_APP_WEB_URL= 'YOUR WEB URL'
|
组件中使用:
1
| console.log(import.meta.env.VITE_APP_WEB_URL)
|
配置 package.json:
打包区分开发环境和生产环境
1
2
| "build:dev": "vite build --mode development",
"build:pro": "vite build --mode production",
|
三、配置跨域代理
在vite.config.ts中
1
2
3
4
5
6
7
8
9
10
11
12
13
14
15
16
17
18
19
20
21
22
23
24
25
26
27
28
29
30
31
32
33
34
| export default defineConfig({
plugins: [vue()],
resolve: {
alias: {
'@': resolve('src'),
comps: resolve('src/components'),
apis: resolve('src/apis'),
views: resolve('src/views'),
utils: resolve('src/utils'),
routes: resolve('src/routes'),
styles: resolve('src/styles')
}
},
server: {
host: '',
port: 3088,
strictPort: false,
open: false,
proxy: {
'/api': {
target: '',
changeOrigin: true,
rewrite: path => path.replace(/^\/api/, '')
}
}
}
})
|
使用跨域代理:
用代理, 首先你得有一个标识, 告诉他你这个连接要用代理. 不然的话, 可能你的 html, css, js这些静态资源都跑去代理. 所以我们一般只有接口用代理, 静态文件用本地.‘/api’: {}, 就是告诉node, 我接口只有是’/api’开头的才用代理.所以你的接口就要这么写 /api/xx/xx. 最后代理的路径就是 http://xxx.xx.com/api/xx/xx.可是不对啊, 我正确的接口路径里面没有/api啊. 所以就需要 pathRewrite,把’/api’去掉, 这样既能有正确标识, 又能在请求接口的时候去掉api.
四、添加 css 预处理器 sass
安装 :
1
2
| npm install -D sass sass-loader
或者yarn add sass sass-loader
|
在 src/assets 下新增 style 文件夹,用于存放全局样式文件
五、约束代码风格
TypeScirpt 官方决定全面采用 ESLint 作为代码检查的工具,并创建了一个新项目 typescript-eslint,提供了 TypeScript 文件的解析器 @typescript-eslint/parser 和相关的配置选项 @typescript-eslint/eslint-plugin 等
1.Eslint支持
1
2
3
4
5
6
7
8
9
10
11
12
13
14
| # eslint 安装
yarn add eslint --dev
# eslint 插件安装
yarn add eslint-plugin-vue --dev
yarn add @typescript-eslint/eslint-plugin --dev
yarn add eslint-plugin-prettier --dev
# typescript parser
yarn add @typescript-eslint/parser --dev
直接:npm i typescript eslint eslint-plugin-vue @typescript-eslint/parser @typescript-eslint/eslint-plugin -D
|
注意: 如果 eslint 安装报错:
可以尝试运行以下命令:
1
| yarn config set ignore-engines true
|
项目下新建 .eslintrc.js配置 eslint 校验规则:
1
2
3
4
5
6
7
8
9
10
11
12
13
14
15
16
17
18
19
20
21
22
23
24
25
26
27
28
29
30
31
32
33
34
35
36
37
38
39
40
41
42
43
44
45
46
47
48
49
50
51
52
53
54
55
56
57
58
59
60
61
62
63
64
|
const { defineConfig } = require('eslint-define-config')
module.exports = defineConfig({
root: true,
parser: 'vue-eslint-parser',
parserOptions: {
parser: '@typescript-eslint/parser',
},
globals: {
Nullable: true,
},
extends: [
'plugin:vue/vue3-recommended',
'eslint:recommended',
'plugin:@typescript-eslint/recommended',
'prettier',
'plugin:prettier/recommended',
],
rules: {
'no-var': 'error',
semi: 'off',
'@typescript-eslint/consistent-type-definitions': ['error', 'interface'],
'@typescript-eslint/no-explicit-any': 'off',
'@typescript-eslint/explicit-module-boundary-types': 'off',
'@typescript-eslint/ban-types': 'off',
'@typescript-eslint/no-unused-vars': 'off',
'vue/html-indent': [
'error',
4,
{
attribute: 1,
baseIndent: 1,
closeBracket: 0,
alignAttributesVertically: true,
ignores: [],
},
],
'vue/max-attributes-per-line': ['off'],
'vue/component-name-in-template-casing': [
'error',
'PascalCase',
{
registeredComponentsOnly: false,
ignores: [],
},
],
},
})
|
项目下新建 .eslintignore
1
2
3
| # eslint 忽略检查 (根据项目需要自行添加)
node_modules
dist
|
2.prettier支持
1
2
| # 安装 prettier
yarn add prettier --dev
|
解决 eslint 和 prettier 冲突
解决 ESLint 中的样式规范和 prettier 中样式规范的冲突,以 prettier 的样式规范为准,使 ESLint 中的样式规范自动失效
1
2
| # 安装插件 eslint-config-prettier
yarn add eslint-config-prettier --dev
|
项目下新建 .prettier.js
配置 prettier 格式化规则:
1
2
3
4
5
6
7
8
9
10
11
12
13
14
15
16
17
| module.exports = {
tabWidth: 2,
jsxSingleQuote: true,
jsxBracketSameLine: true,
printWidth: 100,
singleQuote: true,
semi: false,
overrides: [
{
files: '*.json',
options: {
printWidth: 200,
},
},
],
arrowParens: 'always',
}
|
项目下新建 .prettierignore
1
2
3
| # 忽略格式化文件 (根据项目需要自行添加)
node_modules
dist
|
package.json 配置:
1
2
3
4
5
6
| {
"script": {
"lint": "eslint src --fix --ext .ts,.tsx,.vue,.js,.jsx",
"prettier": "prettier --write ."
}
}
|
上面配置完成后,可以运行以下命令测试下代码检查个格式化效果:
1
2
3
4
| # eslint 检查
yarn lint
# prettier 自动格式化
yarn prettier
|
六、安装路由
1
2
| # 安装路由
yarn add vue-router@4
|
在 src 文件下新增 router 文件夹 => index.ts 文件,内容如下:
1
2
3
4
5
6
7
8
9
10
11
12
13
14
15
16
| import { createRouter, createWebHistory, RouteRecordRaw } from 'vue-router'
const routes: RouteRecordRaw[] = [
{
path: '/',
name: 'Login',
component: () => import('@/pages/login/Login.vue'),
},
]
const router = createRouter({
history: createWebHistory(),
routes,
})
export default router
|
修改入口文件 mian.ts :
1
2
3
4
5
6
7
| import { createApp } from 'vue'
import App from './App.vue'
import router from './router/index'
const app = createApp(App)
app.use(router)
app.mount('#app')
|
七、axios统一请求封装
1
2
3
4
5
6
7
| # 安装 axios
yarn add axios
# 安装 nprogress 用于请求 loading
# 也可以根据项目需求自定义其它 loading
yarn add nprogress
# 类型声明,或者添加一个包含 `declare module 'nprogress'
yarn add @types/nprogress --dev
|
新增 service 文件夹,service 下新增 http.ts 文件以及 moudles 文件夹(存放各模块接口)和interface(公共ts)文件夹:
http.ts : 用于axios封装**
1
2
3
4
5
6
7
8
9
10
11
12
13
14
15
16
17
18
19
20
21
22
23
24
25
26
27
28
29
30
31
32
33
34
35
36
37
38
39
40
41
42
43
44
45
46
47
48
49
50
51
52
53
54
55
56
57
58
59
60
61
62
63
64
65
66
67
68
69
70
71
72
73
74
75
76
77
78
79
80
81
82
83
84
85
86
87
88
89
90
91
92
93
94
95
96
97
98
99
100
101
102
|
import axios, { AxiosRequestConfig } from 'axios'
import NProgress from 'nprogress'
axios.defaults.baseURL = '/api'
axios.defaults.timeout = 10000
axios.defaults.headers.post['Content-Type'] = 'application/json;charset=UTF-8'
axios.interceptors.request.use(
(config): AxiosRequestConfig<any> => {
const token = window.sessionStorage.getItem('token')
if (token) {
config.headers.token = token
}
return config
},
(error) => {
return error
}
)
axios.interceptors.response.use((res) => {
if (res.data.code === 111) {
sessionStorage.setItem('token', '')
}
return res
})
interface ResType<T> {
code: number
data?: T
msg: string
err?: string
}
interface Http {
get<T>(url: string, params?: unknown): Promise<ResType<T>>
post<T>(url: string, params?: unknown): Promise<ResType<T>>
upload<T>(url: string, params: unknown): Promise<ResType<T>>
download(url: string): void
}
const http: Http = {
get(url, params) {
return new Promise((resolve, reject) => {
NProgress.start()
axios
.get(url, { params })
.then((res) => {
NProgress.done()
resolve(res.data)
})
.catch((err) => {
NProgress.done()
reject(err.data)
})
})
},
post(url, params) {
return new Promise((resolve, reject) => {
NProgress.start()
axios
.post(url, JSON.stringify(params))
.then((res) => {
NProgress.done()
resolve(res.data)
})
.catch((err) => {
NProgress.done()
reject(err.data)
})
})
},
upload(url, file) {
return new Promise((resolve, reject) => {
NProgress.start()
axios
.post(url, file, {
headers: { 'Content-Type': 'multipart/form-data' },
})
.then((res) => {
NProgress.done()
resolve(res.data)
})
.catch((err) => {
NProgress.done()
reject(err.data)
})
})
},
download(url) {
const iframe = document.createElement('iframe')
iframe.style.display = 'none'
iframe.src = url
iframe.onload = function () {
document.body.removeChild(iframe)
}
document.body.appendChild(iframe)
},
}
export default http
|
例如:moudles 下新增login文件夹,用于存放登录模块的请求接口,login 文件夹下分别新增 login.ts types.ts :
1
2
3
4
5
6
7
8
9
10
| import http from '@/service/http'
import * as T from './types'
const loginApi: T.ILoginApi = {
login(params){
return http.post('/login', params)
}
}
export default loginApi
|
types.ts:
1
2
3
4
5
6
7
| export interface ILoginParams {
userName: string
passWord: string | number
}
export interface ILoginApi {
login: (params: ILoginParams)=> Promise<any>
}
|
八、状态管理 pinia
1
2
| # 安装
yarn add pinia@next
|
在 src 文件夹下新增 store 文件夹,接在在 store 中新增 main.ts
main.ts 中增加
1
2
3
4
| # 引入
import { createPinia } from "pinia"
# 创建根存储库并将其传递给应用程序
app.use(createPinia())
|
九、添加element-plus
1
2
| #安装 element-plus
yarn add element-plus
|
1.element-plus按需引入
需要用到两个插件unplugin-vue-components、unplugin-auto-import这两个插件。
1
| npm i unplugin-vue-components unplugin-auto-import -D
|
另外这里要注意的是,由于使用了 unplugin-vue-components unplugin-auto-import 这两个插件,按需加载其实是不需要 import 组件,但如果使用Api创建组件,例如elmesage,elnotification这些,可以看到不 import 的话会提示错误,如果 import 又会导致样式的丢失,需要下载一个插件
1
2
3
| yarn add unplugin-element-plus -D
#或者
npm i unplugin-element-plus -D
|
配置vite.config.js
1
2
3
4
5
6
7
8
9
10
11
12
13
14
15
16
17
18
19
20
21
22
23
24
25
26
27
28
29
30
31
32
33
34
35
36
37
38
39
40
41
42
43
44
45
46
47
48
49
50
51
52
53
54
55
56
57
58
59
| import { defineConfig } from "vite";
import vue from "@vitejs/plugin-vue";
import path from "path";
import AutoImport from 'unplugin-auto-import/vite'
import Components from 'unplugin-vue-components/vite'
import { ElementPlusResolver } from 'unplugin-vue-components/resolvers'
import ElementPlus from 'unplugin-element-plus/vite'
const resolve = (dir: string) => path.join(__dirname, dir);
export default defineConfig({
plugins: [
vue(),
AutoImport({
resolvers: [ElementPlusResolver()],
}),
Components({
resolvers: [ElementPlusResolver()],
}),
ElementPlus()
],
resolve: {
alias: {
"@": resolve("src"),
comps: resolve("src/components"),
service: resolve("src/service"),
views: resolve("src/views"),
route: resolve("src/route"),
},
},
server: {
host: "127.0.0.1",
port: 3088,
strictPort: false,
open: true,
proxy: {
"/api": {
target: "http://localhost:3000",
changeOrigin: true,
rewrite: (path) => path.replace(/^\/api/, ""),
},
},
},
});
|
2.添加element-plus图标
1
2
3
4
| # NPM
$ npm install @element-plus/icons-vue
# Yarn
$ yarn add @element-plus/icons-vue
|
然后在main.ts中全局注册并使用
1
2
3
4
| import * as ElementPlusIconsVue from '@element-plus/icons-vue'
Object.keys(ElementPlusIconsVue).forEach(key => {
app.component(key, ElementPlusIconsVue[key as keyof typeof ElementPlusIconsVue]);
});
|
十、svg图标插件使用
1.安装svg图标插件
1
2
| #安装插件vue-svg-icon
npm install vue-svg-icon --save-dev
|
2. 注册全局组件svgIcon
在main.ts中全局注册并使用
1
2
3
4
5
6
7
8
9
10
11
12
13
14
15
16
17
| import { createApp } from 'vue'
import App from './App.vue'
import router from './router/index'
import { createPinia } from "pinia"
import SvgIcon from './components/SvgIcon/index.vue'
import * as ElementPlusIconsVue from '@element-plus/icons-vue'
import "element-plus/dist/index.css"
import './styles/index.scss'
const app = createApp(App)
Object.keys(ElementPlusIconsVue).forEach(key => {
app.component(key, ElementPlusIconsVue[key as keyof typeof ElementPlusIconsVue]);
});
app.use(router).use(createPinia()).component('svg-icon', SvgIcon).mount('#app')
|
3.下载存放svg图标
在src下新建assets=>icons=>svg文件夹,用来存放svg图标,所有下载的SVG图标放入其中

4. 使用svg图标
以bug.svg图标为例,修改scale的值调整图标的大小。
1
| <svgIcon name="del" :scale="1" />
|
十一、untils文件夹
在根目录下新建一个untils文件夹,这个文件夹下的内容主要是导出常用的一些公共方法等等:
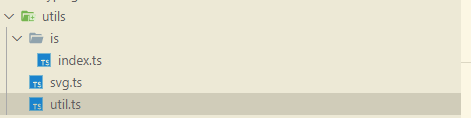
untils=>util.ts
1
2
3
4
5
6
7
8
9
10
11
12
13
14
15
16
17
18
19
20
21
22
23
24
25
26
27
28
29
30
31
32
33
34
35
36
37
38
39
40
41
42
43
44
45
46
47
48
49
50
51
52
53
54
55
56
57
58
59
60
61
62
63
64
65
66
67
68
69
70
71
72
73
74
75
76
77
78
79
80
81
82
83
84
85
86
87
88
89
90
91
92
93
94
95
96
97
98
99
100
101
102
103
104
105
106
107
108
109
110
111
112
113
114
115
116
117
118
119
120
121
122
123
124
125
126
127
128
129
130
131
132
133
134
135
136
137
138
139
140
141
142
143
144
145
146
147
148
149
150
151
152
153
154
155
156
157
158
159
160
161
162
163
164
165
166
167
168
169
170
|
import { isArray } from "@/utils/is";
export function localGet(key: string) {
const value = window.localStorage.getItem(key);
try {
return JSON.parse(window.localStorage.getItem(key) as string);
} catch (error) {
return value;
}
}
export function localSet(key: string, value: any) {
window.localStorage.setItem(key, JSON.stringify(value));
}
export function localRemove(key: string) {
window.localStorage.removeItem(key);
}
export function localClear() {
window.localStorage.clear();
}
export function deepCopy<T>(obj: any): T {
let newObj: any;
try {
newObj = obj.push ? [] : {};
} catch (error) {
newObj = {};
}
for (let attr in obj) {
if (typeof obj[attr] === "object") {
newObj[attr] = deepCopy(obj[attr]);
} else {
newObj[attr] = obj[attr];
}
}
return newObj;
}
export function isType(val: any) {
if (val === null) return "null";
if (typeof val !== "object") return typeof val;
else return Object.prototype.toString.call(val).slice(8, -1).toLocaleLowerCase();
}
export function randomNum(min: number, max: number): number {
let num = Math.floor(Math.random() * (min - max) + max);
return num;
}
export function getTabPane<T, U>(menuList: any[], path: U): T {
let result: any;
for (let item of menuList || []) {
if (item.path === path) result = item;
const res = getTabPane(item.children, path);
if (res) result = res;
}
return result;
}
export function handleRouter(routerList: Menu.MenuOptions[], newArr: string[] = []) {
routerList.forEach((item: Menu.MenuOptions) => {
typeof item === "object" && item.path && newArr.push(item.path);
item.children && item.children.length && handleRouter(item.children, newArr);
});
return newArr;
}
export function getFlatArr(arr: any) {
return arr.reduce((pre: any, current: any) => {
let flatArr = [...pre, current];
if (current.children) flatArr = [...flatArr, ...getFlatArr(current.children)];
return flatArr;
}, []);
}
export function defaultFormat(row: number, col: number, callValue: any) {
if (isArray(callValue)) return callValue.length ? callValue.join(" / ") : "--";
return callValue ?? "--";
}
export function formatValue(callValue: any) {
if (isArray(callValue)) return callValue.length ? callValue.join(" / ") : "--";
return callValue ?? "--";
}
export function filterEnum(callValue: any, enumData: any, searchProps?: { [key: string]: any }, type?: string): string {
const value = searchProps?.value ?? "value";
const label = searchProps?.label ?? "label";
let filterData: any = {};
if (Array.isArray(enumData)) filterData = enumData.find((item: any) => item[value] === callValue);
if (type == "tag") return filterData?.tagType ? filterData.tagType : "";
return filterData ? filterData[label] : "--";
}
|
is文件夹下的index.ts 常用的判断方式,is=>index.ts
1
2
3
4
5
6
7
8
9
10
11
12
13
14
15
16
17
18
19
20
21
22
23
24
25
26
27
28
29
30
31
32
33
34
35
36
37
38
39
40
41
42
43
44
45
46
47
48
49
50
51
52
53
54
55
56
57
58
59
60
61
62
63
64
65
66
67
68
69
70
71
72
73
74
75
76
77
78
79
80
81
82
83
84
85
86
87
88
89
90
91
92
93
94
95
96
97
98
99
100
101
102
103
104
105
106
107
108
109
110
111
112
113
114
115
116
117
118
| const toString = Object.prototype.toString;
export function is(val: unknown, type: string) {
return toString.call(val) === `[object ${type}]`;
}
export function isFunction<T = Function>(val: unknown): val is T {
return is(val, "Function");
}
export const isDef = <T = unknown>(val?: T): val is T => {
return typeof val !== "undefined";
};
export const isUnDef = <T = unknown>(val?: T): val is T => {
return !isDef(val);
};
export const isObject = (val: any): val is Record<any, any> => {
return val !== null && is(val, "Object");
};
export function isDate(val: unknown): val is Date {
return is(val, "Date");
}
export function isNumber(val: unknown): val is number {
return is(val, "Number");
}
export function isAsyncFunction<T = any>(val: unknown): val is Promise<T> {
return is(val, "AsyncFunction");
}
export function isPromise<T = any>(val: unknown): val is Promise<T> {
return is(val, "Promise") && isObject(val) && isFunction(val.then) && isFunction(val.catch);
}
export function isString(val: unknown): val is string {
return is(val, "String");
}
export function isBoolean(val: unknown): val is boolean {
return is(val, "Boolean");
}
export function isArray(val: any): val is Array<any> {
return val && Array.isArray(val);
}
export const isClient = () => {
return typeof window !== "undefined";
};
export const isWindow = (val: any): val is Window => {
return typeof window !== "undefined" && is(val, "Window");
};
export const isElement = (val: unknown): val is Element => {
return isObject(val) && !!val.tagName;
};
export const isServer = typeof window === "undefined";
export function isImageDom(o: Element) {
return o && ["IMAGE", "IMG"].includes(o.tagName);
}
export function isNull(val: unknown): val is null {
return val === null;
}
export function isNullAndUnDef(val: unknown): val is null | undefined {
return isUnDef(val) && isNull(val);
}
export function isNullOrUnDef(val: unknown): val is null | undefined {
return isUnDef(val) || isNull(val);
}
|
十二、typings->global.d.ts放全局变量,命名空间
1
2
3
4
5
6
7
8
9
10
11
12
13
14
15
16
17
18
19
20
21
22
23
24
25
26
27
| // * Menu
declare namespace Menu {
interface MenuOptions {
path: string;
title: string;
icon?: string;
isLink?: string;
close?: boolean;
children?: MenuOptions[];
}
}
declare type TabsOptions = Menu.MenuOptions & {};
// * Vite
declare type Recordable<T = any> = Record<string, T>;
declare interface ViteEnv {
VITE_API_URL: string;
VITE_PORT: number;
VITE_OPEN: boolean;
VITE_GLOB_APP_TITLE: string;
VITE_DROP_CONSOLE: boolean;
VITE_PROXY_URL: string;
VITE_BUILD_GZIP: boolean;
VITE_REPORT: boolean;
}
|
十三、vue3.0使用tsx语法
1.下载
1
| yarn add @vitejs/plugin-vue-jsx -D
|
2.引入
在vite.config.ts中
1
2
3
4
5
6
7
8
| import { defineConfig } from 'vite'
import vue from '@vitejs/plugin-vue'
import vueJsx from '@vitejs/plugin-vue-jsx';
// https://vitejs.dev/config/
export default defineConfig({
plugins: [vue(),vueJsx()]
})
|
3.tsconfig.json 配置文件
1
2
3
| "jsx": "preserve",
"jsxFactory": "h",
"jsxFragmentFactory": "Fragment",
|
参考文章:
Vite2 + Vue3 + TypeScript + Pinia 搭建一套企业级的开发脚手架
Vue3 + Ts + ElementPlus + Vite2 从零搭建后台管理系统
禾几元老哥的github源码